How to Build a Reliable Visual Record of Construction Progress
Construction projects move fast, and keeping track of every stage is essential for staying on schedule, managing budgets, and communicating with stakeholders. A reliable visual record does more than show what the site looks like today. It gives you a clear, date-stamped view of progress that you can compare with plans, share with clients, and use to settle disputes if they arise. Without a systematic approach, photos become scattered, dates get mixed up, and the record loses its value. Here is how to create a visual record that you can actually rely on.
Start With a Clear Capture Plan
The first step is deciding what you need to capture and how often. A construction site changes daily, but not every change matters equally. Begin by mapping out the key building stages: foundation work, framing, roofing, MEP rough-in, drywall, finishes. For each stage, identify the critical elements that need visual proof. Is the slab pour complete? Are the steel columns plumb? Has the waterproofing been applied before backfill? These are the moments that a photo should catch.
Set a regular capture schedule that matches your construction schedule. Weekly captures work for most projects, but during fast-moving phases like concrete work or steel erection, you might want captures every two or three days. The important thing is consistency. A gap of two weeks during a critical pour can leave you without proof that work was done correctly before it was covered up. Decide on the frequency and stick to it.
Choose the Right Capture Method
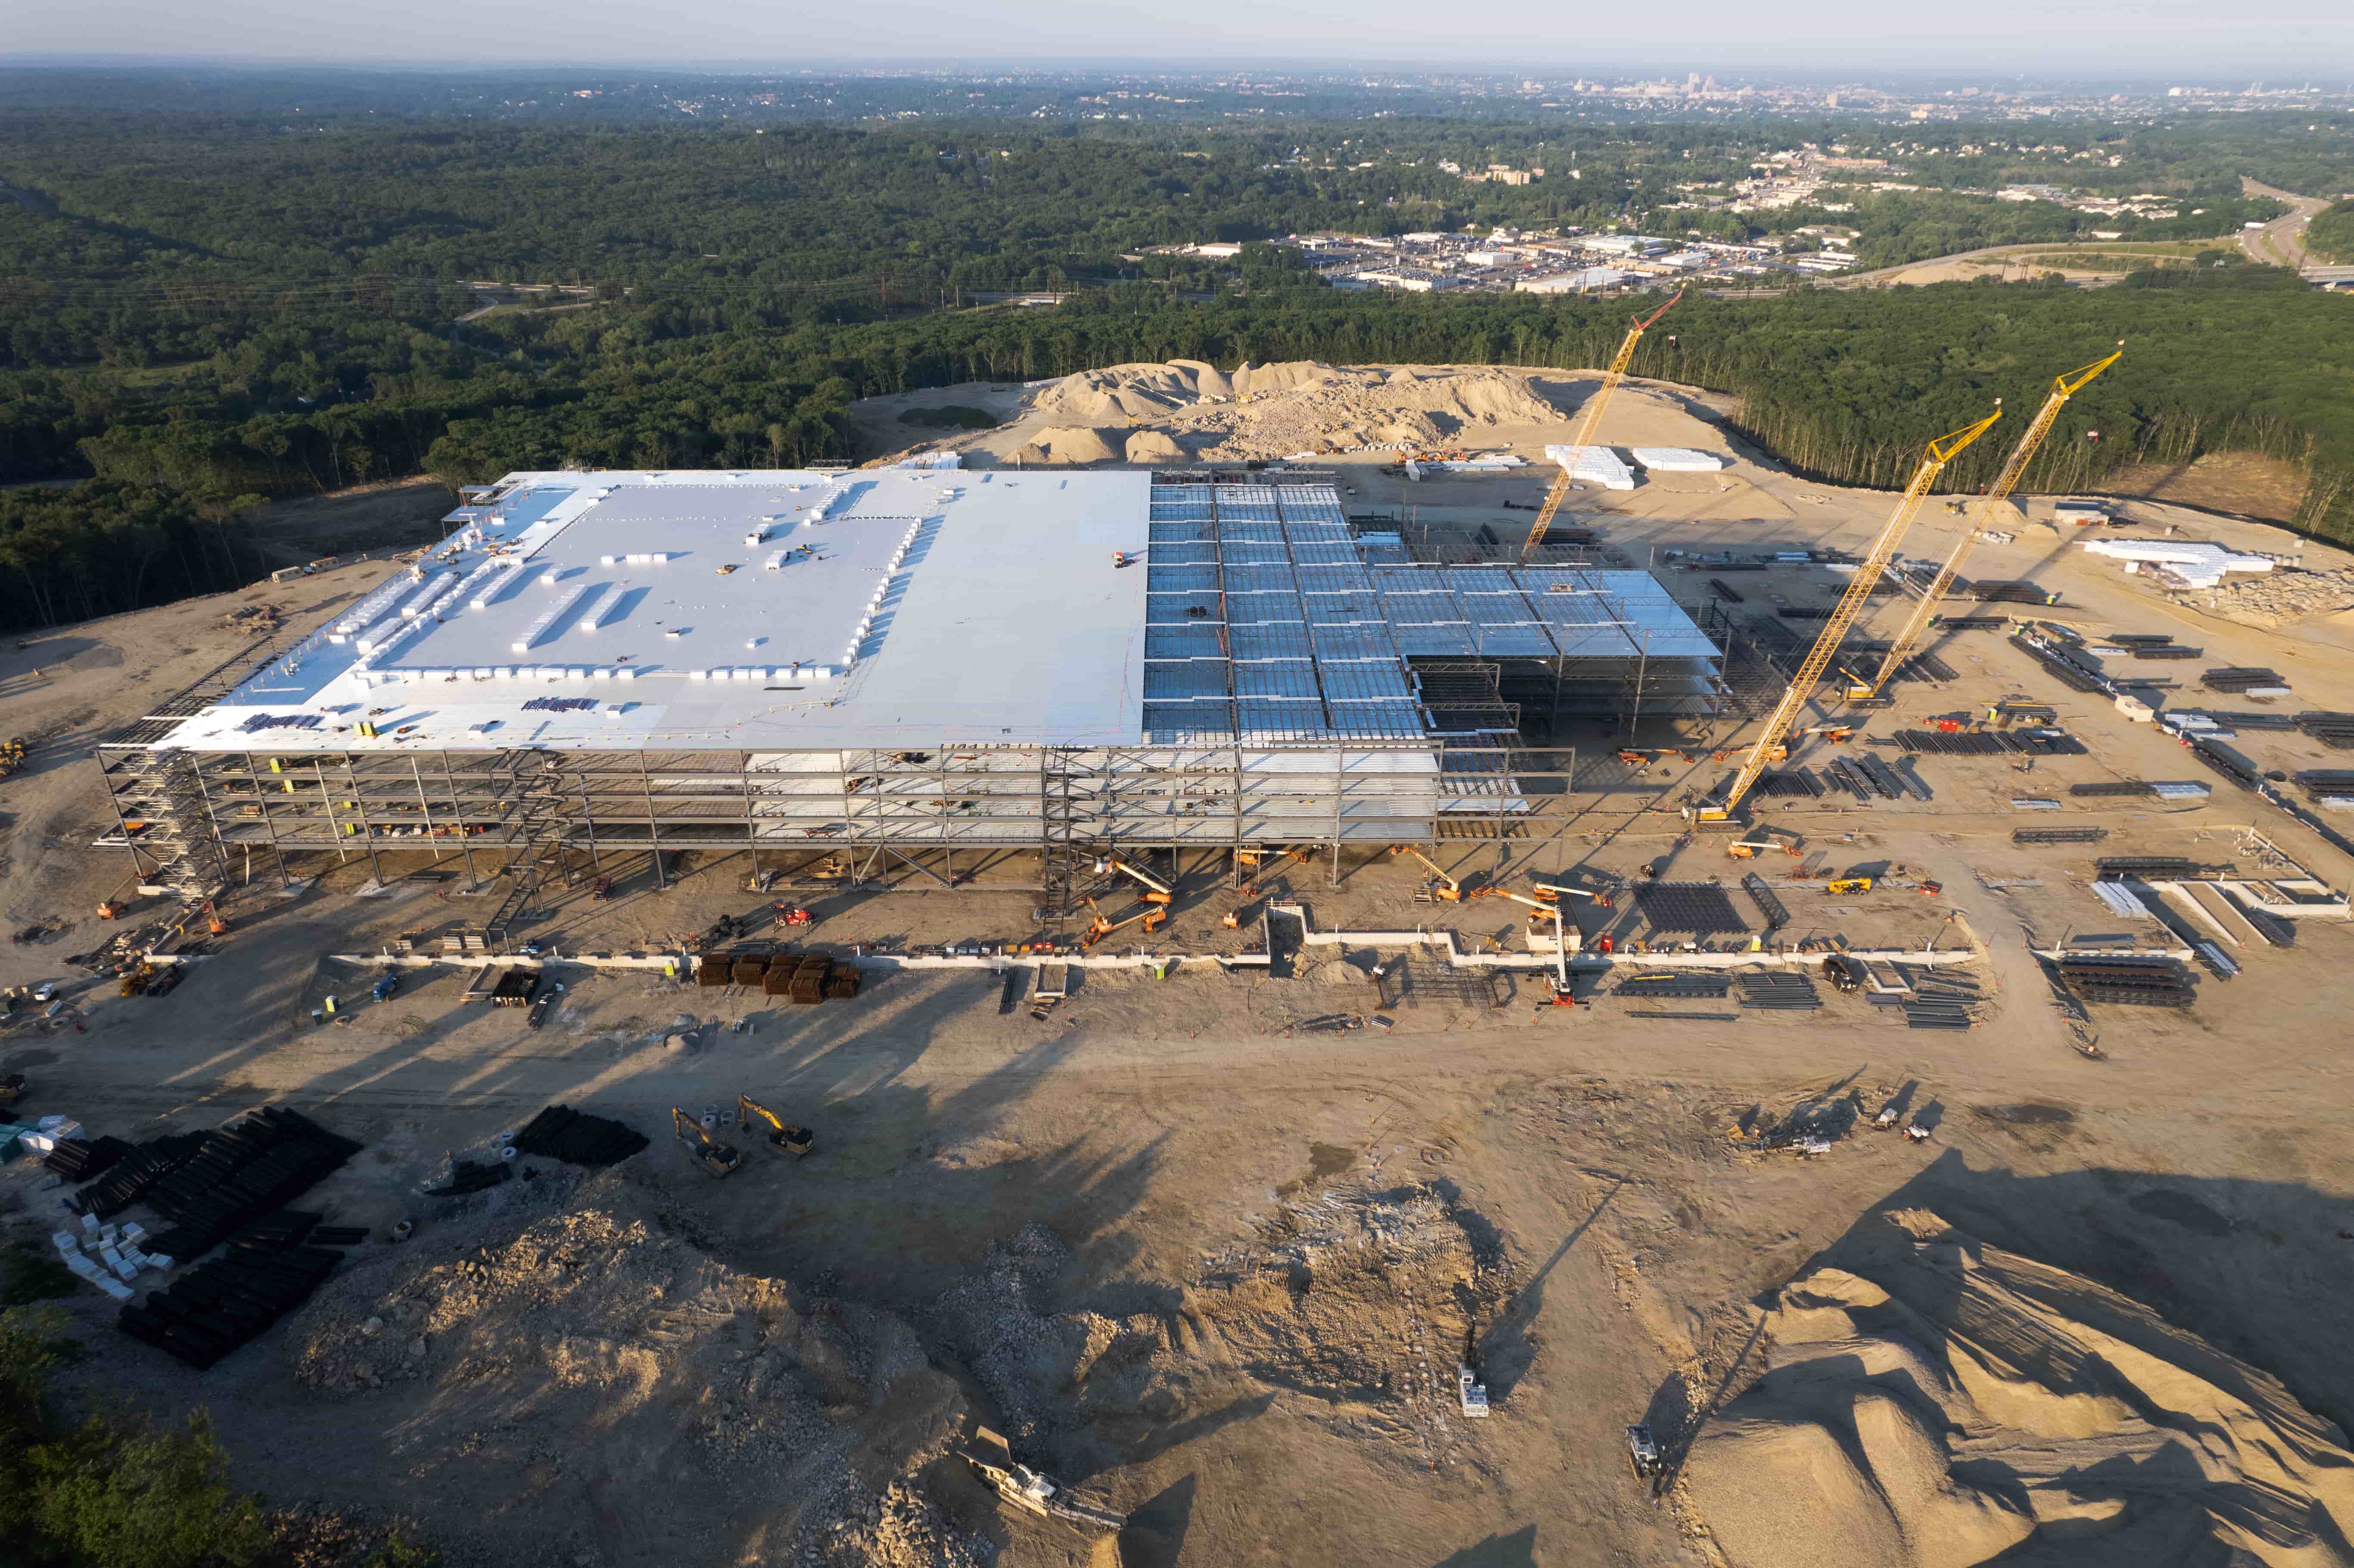
Ground-level photos from a phone or a standard camera are useful, but they have limits. A single photo from ground level shows only a small slice of the site. It is hard to see the whole building footprint, the roof condition, or how the site drainage is holding up. That is where aerial captures add real value. A drone can cover the entire site in a few minutes, giving you overview shots that show the big picture, plus detailed angles that ground photos miss.
For a complete record, combine ground-level photos with aerial images. Ground photos capture close-up details like welding quality, sealant application, or the condition of exposed rebar. Aerial photos capture the overall layout, roof progress, site access, and the relationship between different building zones. Together, they give you a full picture that either method alone cannot provide.
When you plan aerial captures, think about what you need to see. A straight-down orthophoto is excellent for measuring distances and tracking excavation or slab work. An oblique angle - shot at roughly 45 degrees - is better for showing building height, facade progress, and how elements stack up. A 360-degree panorama at key locations gives a immersive view that is helpful for remote stakeholders who cannot visit the site.
Organise by Date and Milestone
Once you have the captures, the real work begins: organising them so they are useful. A folder full of files named "IMG_0421.JPG" is not a record. It is a mess. Every capture needs a clear date, a label that identifies the building stage or milestone, and a note about what the photo shows. A simple naming convention such as "2025-03-15_Foundation_SlabPour.jpg" makes it easy to find the right image later.
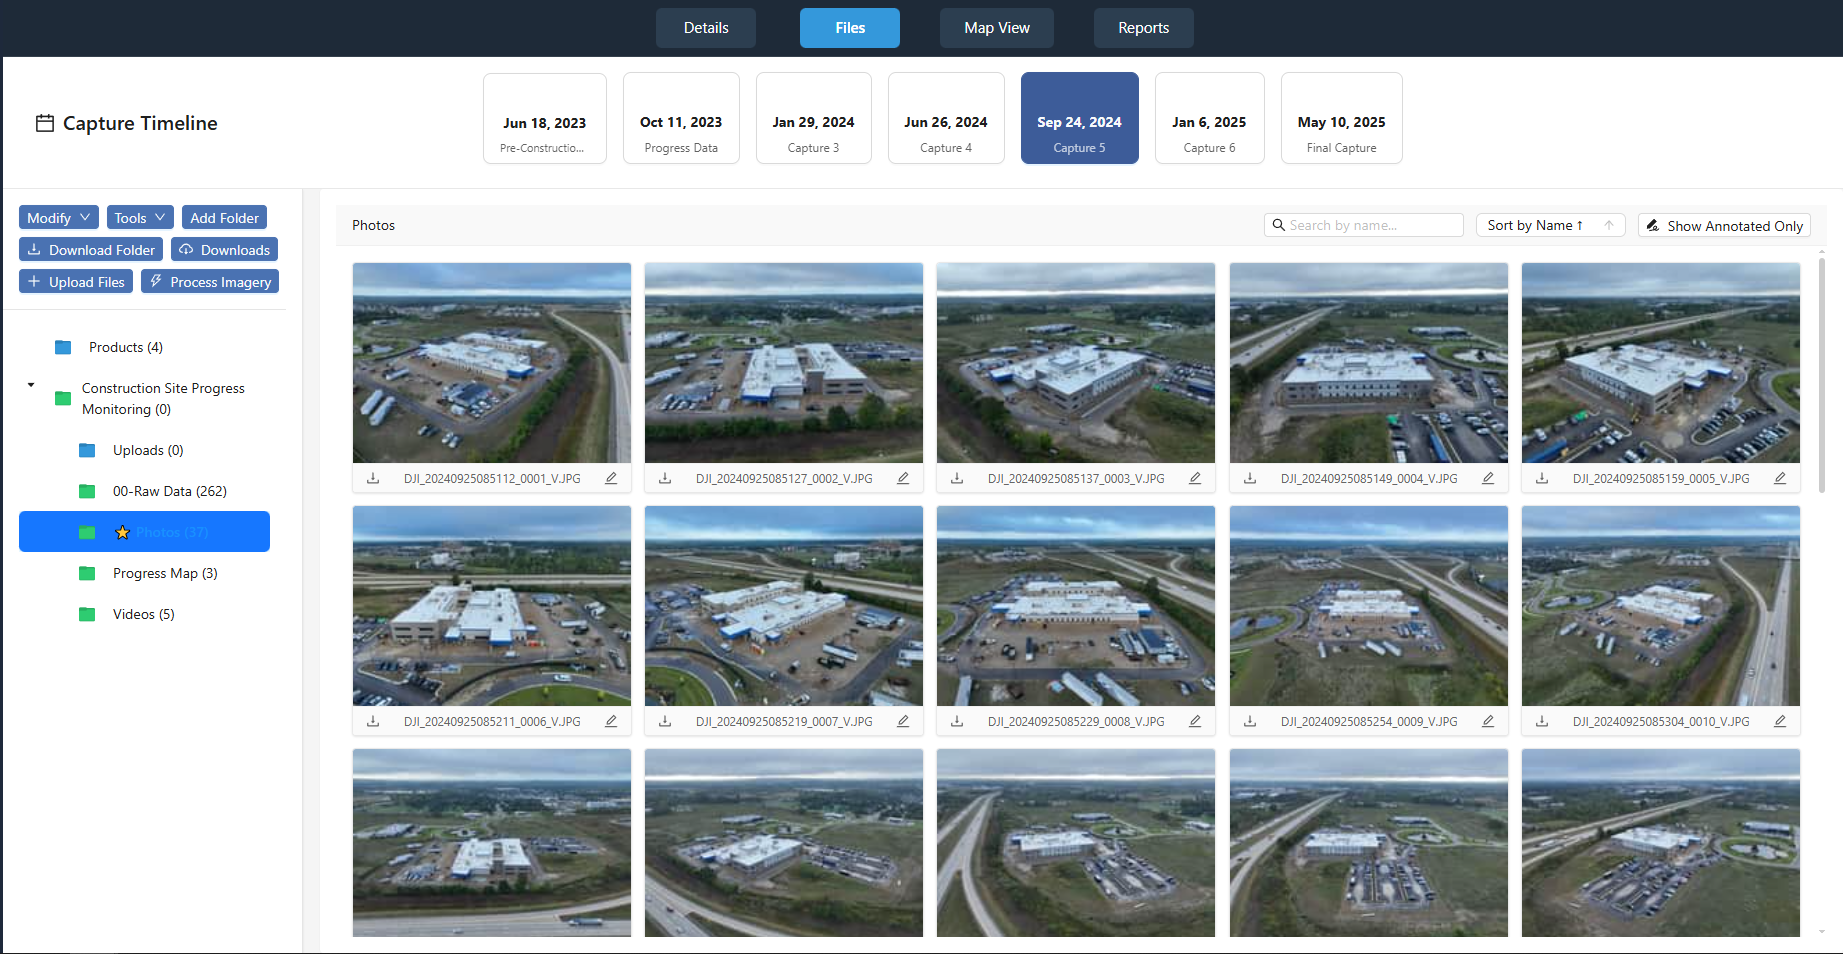
Better yet, use a project portal that organises captures by date and by milestone automatically. When you upload a set of images, the system can tag them with the capture date and let you group them by building stage. This way, you can pull up all the photos from the roofing phase, or compare the north elevation across three different dates side by side. The goal is to make the record searchable and comparable without digging through dozens of folders.
One of the most valuable things you can do is create dated aerial records of progress at regular intervals. These give you a bird's-eye view of the entire site on a specific date, which is perfect for progress reports and for showing the client how the project is moving along. When you have a set of these captures spaced a week or two apart, you can literally see the building rise from the ground.
Consistency in Perspective and Scale
A common mistake is to take photos from different spots each time, so the images are hard to compare. To make a visual record truly useful, standardise the capture points. Mark a few fixed locations on site where you will take a photo every visit. For ground photos, use a tripod or at least stand at the same spot each time. For aerial captures, use the same altitude and angle so that two images from different dates can be overlaid or compared directly.
Scale is another factor. A photo of a wall does not tell you much if you cannot judge its height or thickness. Include a reference object in the frame - a person, a measuring pole, or a known-size object - so that anyone viewing the image can gauge dimensions. For aerial shots, ground control points or known features such as a parking lot stripe or a building edge help with scale and alignment.
Review and Verify Before It Is Too Late
Captures are only useful if they are reviewed while the work is still visible. A photo of an open trench is valuable the day it is taken, but once the trench is backfilled, that photo becomes the only proof of what was there. Set aside time after each capture to review the images against the construction schedule. Check that the work matches the plans, that there are no obvious defects, and that the captures cover all the areas that were supposed to be photographed that week.
If something looks off, flag it immediately. A crack in a foundation wall, a missing flashing detail, or an incorrectly placed pipe can be corrected if caught early. But if you wait until the next milestone, the issue may be buried under drywall or concrete, and fixing it becomes much more expensive. The visual record is your early warning system - use it that way.
This is also the time to ensure that your dated aerial records of progress are complete. Check that you have a full set of overview shots and detail shots for each visit. If the drone missed a corner of the roof because of a low battery, note it and plan to capture that area on the next flight. Consistency across visits is what makes the record reliable.
Share the Record With the Right People
A visual record that sits on a hard drive is not serving anyone. Share it with the project team, the client, and the subcontractors who need it. A project portal that organises captures by date and milestone makes this easy. You can give the client a link to view the latest aerial overview, or send a progress report that includes a few key images alongside the written update.
When you share the record, include the date and the building stage for each image. This context is critical. A client looking at a photo of a steel frame needs to know whether that frame was erected yesterday or three weeks ago. The date tells them whether the project is on track or falling behind. The milestone label tells them what phase the work is in. Together, they turn a simple image into a piece of project intelligence.
For larger projects, consider creating a time-lapse video from the aerial captures. Many project portals can compile a sequence of images taken from the same angle over weeks or months. A time-lapse shows the entire construction process in a few minutes, which is a powerful communication tool for presentations, marketing, or simply for the team to see how far they have come.
Store and Archive for the Long Term
Construction projects can run for years, and warranty or legal issues can arise long after the building is finished. Keep your visual record in a safe, accessible archive. A cloud-based system with redundant backups is ideal. Label each archive with the project name, the date range, and the version of the plans it corresponds to. If you ever need to refer back to a specific detail, you will be glad that the record is well organised.
Do not rely on a single copy. Hard drives fail, phones get lost, and cloud services change their terms. Keep at least two copies in different locations, and test the backups periodically. A visual record that you cannot access is no record at all.
Make the Record Part of Your Workflow
The best visual record is the one that becomes a habit. Integrate the capture, review, and sharing steps into your regular project workflow. Assign someone on site to be responsible for the captures. Set calendar reminders for each capture date. Review the images as part of the weekly project meeting. When the record is part of how you work, it stays complete and accurate without extra effort.
A reliable visual record of construction progress is not a luxury. It is a practical tool that saves time, reduces risk, and keeps everyone on the same page. By planning your captures, organising them well, and reviewing them regularly, you create a resource that pays off throughout the project and beyond.